project: zero-waste pressure sensor swatch
Rats! No time to attend the 2015 eTextile Summer Camp! But I'm still participating in the Swatch Exchange!
This year, I'm focusing again on more industrialized techniques, like I did for the 2013 Swatchbook. I'm making 30 samples of a Zero-waste Pressure Sensor. The pressure sensor will be pretty familiar to e-textile practitioners. It's based on the time-honoured tradition of conductive and pressure-sensitive resistive materials, shown in Hannah's Instructable from many moons ago.
One of the tasks of a good pattern-maker is to optimize pattern piece layout to reduce waste. If you loved playing Tetris, you will love pattern layout! In the garment industry, a few centimeters can translate to measurable savings when scaled up for production.
Over the last decade or so, a small but exciting movement called Zero-waste has grown among apparel designers. The off-cuts, selvedge edges and "negative space" of pattern layout are often used decoratively in zero-waste design, but the most exciting part is when the geometry of flat pattern pieces are designed to fit together to eliminate negative space (waste) altogether. This principle is even more important when we are using textiles plated with heavy metals that we want to keep out of the waste stream.
In case you're interested, last year I made a swatch of the Sound Scales project and documented it here.
progress: finished!
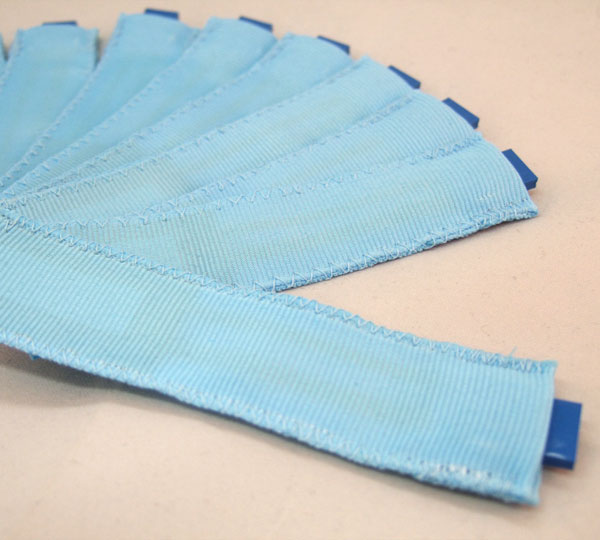
Thirty (well, 29, in the end) pressure sensors ready for a trip to France!
 many sensors
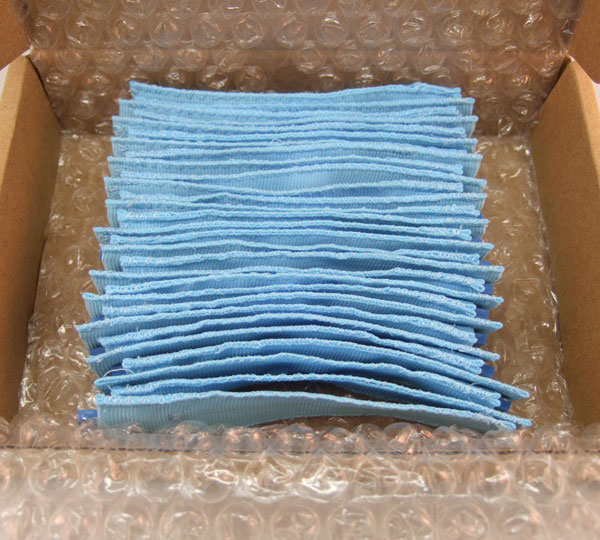 boxed and ready to go
construction: making 30 pressure sensors
This pressure sensor is designed to minimize waste, so everything is square. The covering fabric is polyester grosgrain ribbon, selected so that the long edges are already finished and the cut ends can be heat sealed to minimize fraying.
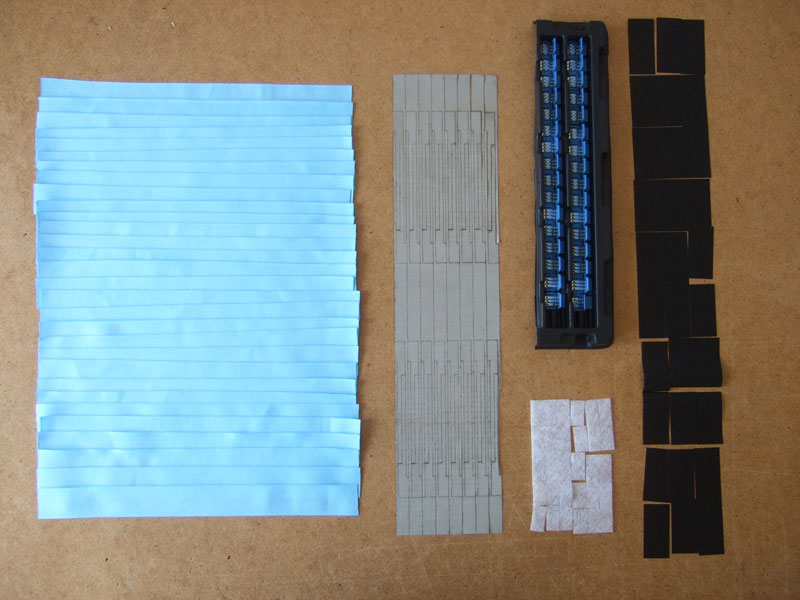 From left to right: grosgrain ribbon cut to size, laser cut conductive fabric, Clincher™ connectors, non-woven to allow conductive fabric ends to float freely for connecting, Velostat™ pressure-sensitive film.
Construction is underway...
design: zero-waste layout
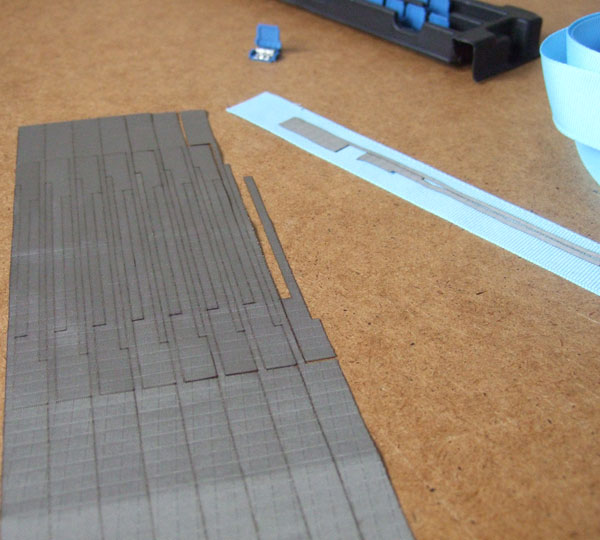
The idea behind this layout is to minimize waste, so the design must fit into itself without any whitespace. The easiest way to achieve this is by sticking to squares. Figure out the general shapes first and then piece them together like a puzzle. Remember to rotate, not flip pattern pieces when using fabric with a right and a wrong side, like the hot-melt adhesive backed conductive fabric I'm using.
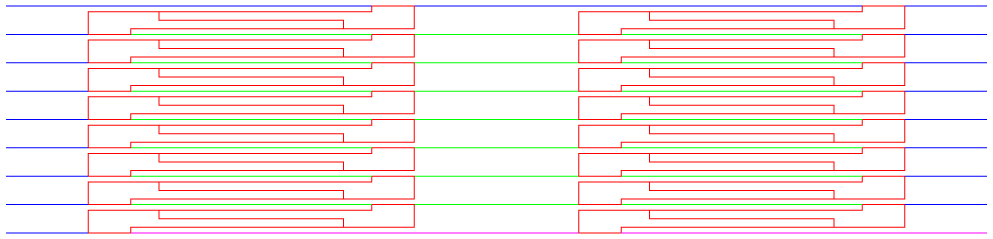
This is the pattern stacking I used - the shaded area shows a single pressure sensor:
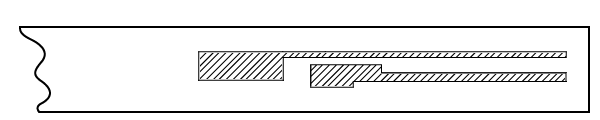
The sensor will be laid out like this:
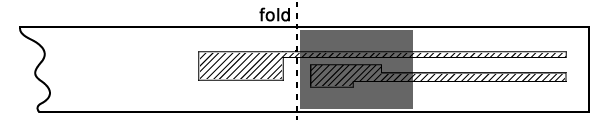
And the pressure-sensitive layer will be folded between the two pieces:
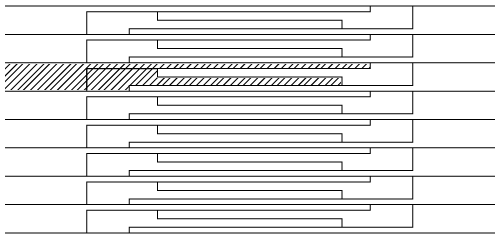
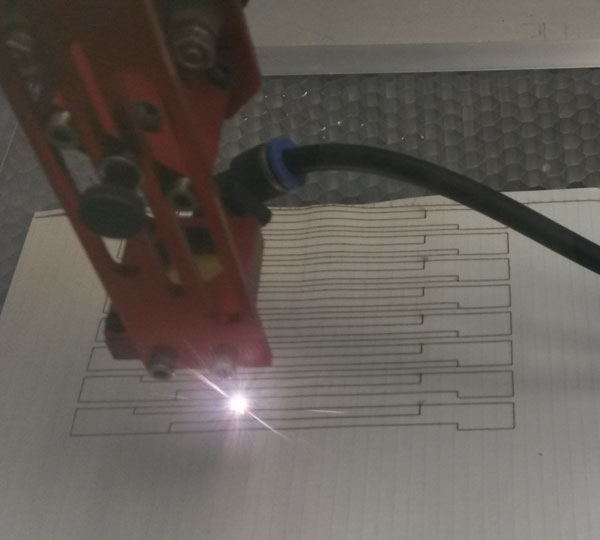
This is the cutting layout for the laser cutter - the red lines will be cut first, followed by green, then blue and pink.
It's best practice to cut the outer lines last, so that the fabric stays intact while it's being cut:
Results of the laser cutting:
 laser cutting on the reverse side
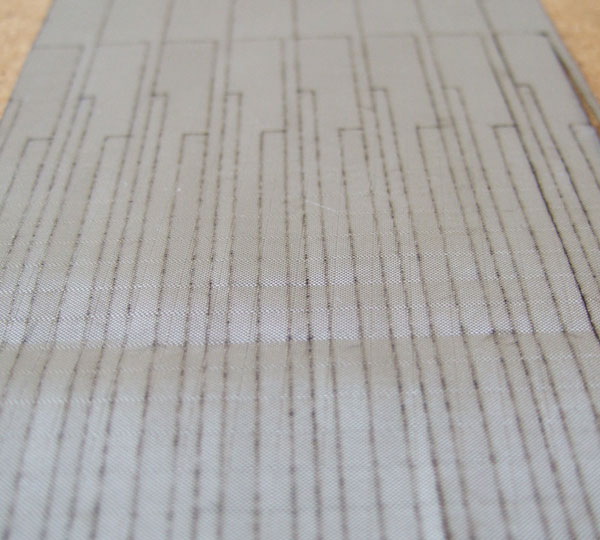 conductive face of pattern pieces